Metal has been worked by humans for thousands of years. Over time, the techniques and technology used to produce and shape metal goods have been driven by the innovations of science and technology.
Before we dive into some of the technical processes available for welding metal together, let’s first take a moment to define a weld. A weld is a fabrication process that joins materials, usually metals or thermoplastics, by fusion. Fusing materials is distinctly different than other kinds of lower temperature metal-joining techniques such as soldering, which do not melt the base metal.
Metal welding is the fusing of two pieces of metal to create one solid continuous piece. All welders work on the same principle: A gas torch or electric welder is used to generate precisely directed heat to melt material, and a filler material is introduced by the operator to complete the fusion.
With time has come innovation and accessibility, and now we’ve come so far that you – yes YOU! – can learn how to weld easily. Let’s get started!
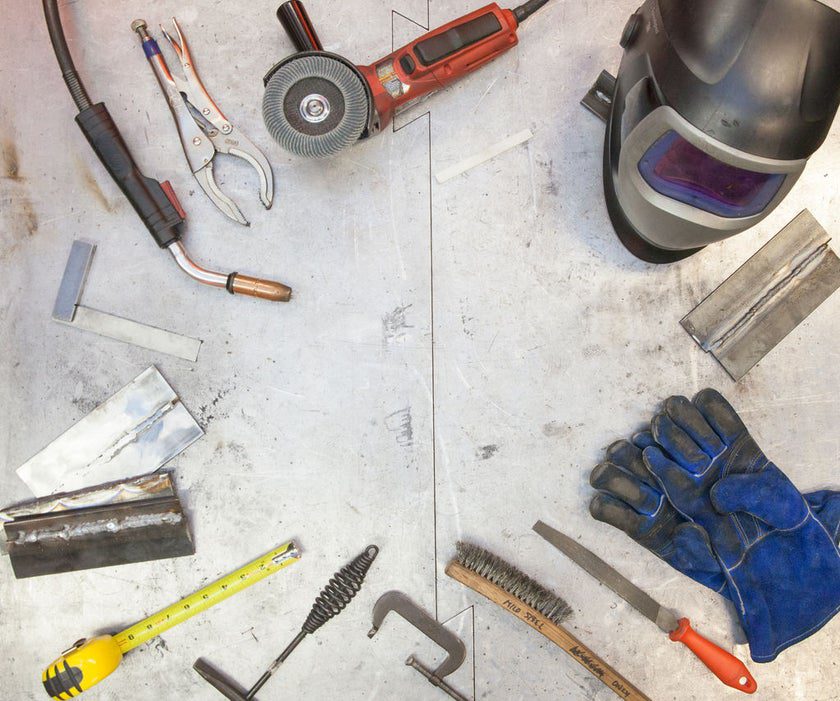
Welding Tools and Materials
Complete Consumables and Tool List for this Class
Choices in Beginner’s MIG welders
- Best – Millermatic 211
- Better – Millermatic 141
- Good – Millermatic 125
Power Tools
- Angle grinder with a paddle switch
- Sawzall (optional)
- Metal Band Saw
Consumables
- Angle grinder wheels
- Welding wire
- Steel – more on this below
- Shielding gas
Clamping, Measuring & Marking
- Soapstone
- Squaring Tools
- Welding magnets
- Scribe
- Welding clamps
- Permanent markers
Hand Tools
- Welding pliers
- Steel wire brush – specifically a steel brush, not a stainless steel or aluminum brush
- Hack saw
Studio Safety
- Welding table
- Welding curtain
- Bricks – available at your local hardware store, or your driveway.
Personal Safety
- Welding helmet
- Welding jacket
- MIG welding gloves
- Safety glasses
- Ear protection
- Grinding visor
- Face Mask
- Work shoes
Supplies for Projects
- 16 gauge cold-rolled sheet steel
- 1″ Square tube, 16 gauge
- 2″ Flat bar, 1/8th inch
- 1″ Flat bar, 1/8th inch
Who This Class Is For

This class is designed for those who are completely new to welding. Throughout this course, amateur metalworkers will learn ideas and tips about how to become skilled welders, ready to push their making craft to the next level.
About Your Instructor
I learned how to weld in college when I took a drop-in advanced sculpture class while constructing my thesis project. I learned primarily Oxy-Acetylene welding to do very fine wire work. To this day, I think Oxy welding is my favorite technique, but it’s not practical for every application, and not as fast as MIG.
I learned MIG welding when learning how to repair bicycles in Reno, and my neighbor handed me the gun to their flux-cored 110v welder and said, ‘Ok, now you do it’. I explained I had never used a MIG welder before and they turned to me and said: “It’s just like using a really hot glue gun.” That phrase shot down whatever fears I had about doing a bad job, and I found myself confidently wielding the torch within 20 minutes.
I’ve taken on large welding projects for Instructables builds, and have done structural welding on sculptures that have traveled around the world.
In short, I’m no pro or expert, but I’m self-taught, experienced and can provide a great pathway to get you metalworking and welding in no time.
Personal Safety Equipment
MIG welding can be safe as long as you follow a few important safety precautions. Welding metal requires us to protect ourselves from the many dangerous aspects of the trade with safety gear to prevent us from getting burned or blinded.

An auto-darkening welding helmet protects our eyes from the light that is generated by any form of arc welding but allows you to see when the arc of the torch is not active. Auto-darkening helmets are helpful if you are doing a bunch of welding and don’t want to jerk the helmet off and on to see what you are doing in between welds.

If you work in a community shop with lots of people, protecting others from seeing the arc by using a welding screen. The screen protects potential on-lookers from getting blinded by the arc.
Having your skin covered is critical. Once you start grinding and welding, hot sparks and molten metal slag can shoot in all different directions. We protect ourselves by wearing heat-resistant leather and natural fiber; synthetic fabrics melt instead of burn, meaning they become molten and burn into the skin, yikes! But honestly, a leather jacket is really hot to wear for any extended welding project. If you’re like me and heat up quickly, you can try a welding apron with a long sleeve flame-resistant cotton shirt.

Most of the time, I wear coveralls that have been rated for use with welding. They cover all my skin, and I can tuck the sleeves into my gloves when I’m welding, or easily roll them up when I’m grinding. This cover will not only protect your skin from the heat produced by welding, it shields your skin from the UV light produced by welder’s arc.
Just like your welding clothes, you are going to want wear very sturdy work shoes that do not have any synthetic materials that could melt. Good work boots or even canvas slip-ons are fine – just no running shoes.
If I’m going to be welding for more than 15 minutes, I’ll even put on sunscreen. I’ve occasionally gotten sunburns on my neck from the small gap between my leathers and my helmet, but SPF 110 seems to do the trick.

When you are welding, you will be gripping and traverse your hands and forearms along some very hot metal. For this reason, we wear MIG welding gloves. Be warned,MIG gloves are the most uncomfortable gloves in the world. They should fit loose so that if they become too hot, you are able to quickly fling them from your arm on to the ground.
Wearing a grinding visor protects your face from flying particulate while you are using a grinder. If you are working to grind off paint, or any other kind of metal finish, consider wearing a face mask to protect you from potential fumes on the steel coating.

I wear safety glasses under my welding helmet for the sole reason that I make sure I am wearing them once I start grinding metal. There are some terribly horrific stories about metal slag and shards coming into contact with eyeballs, I will spare you them and just reiterate – WEAR SAFETY GLASSES. The safety glasses I recommend have a Z87.1 rating. This rating ensures that your eyes are receiving some UV protection from other welders around you, and from flying sparks when you’re grinding.

You also want to protect your ears while welding and grinding by wearing ear muffs or ear plugs. When the fast-spinning grinding wheels come into contact with the steel it is super duper loud, and prolonged exposure can cause pain or even temporary deafness.
It’s important to weld in a well-ventilated area. MIG welding produces fumes which you shouldn’t breathe in. If you are going to be welding and working for longer than 30 minutes, wear either a mask or a respirator that can protect you from metal fumes.
Even More Welding Safety

DO NOT WELD GALVANIZED STEEL. Galvanized steel contains a zinc coating that is applied to industrial steel to prevent rust over a prolonged period of time. (Think streetlamps, and bridge supports) This zinc coating produces carcinogenic and poisonous gas when it is burned. Exposure to the immolated coating can result in heavy metal poisoning also known as ‘welding shivers’. These are flu-like symptoms that can persist for a few days, but that can also cause permanent damage. This is not a joke. I have witnessed someone who has welded galvanized steel out of ignorance and immediately felt the effects and had to be rushed to the hospital, so don’t do it!

Considering Fire Saftey
Molten metal slag can splatter several feet from a weld. Grinding sparks can fly even further. Any sawdust, paper or plastic bags in the area can smolder and catch fire, so keep a tidy area for welding. Most often, your attention will be focused on the parts you are welding, and not the area around you, so it can be hard to see what’s going on behind you if something catches fire. Reduce the chance of that happening by clearing away all flammable objects from your weld area.
This is a good precaution for any shop, but keep a fire extinguisher beside the exit door from your workshop. CO2 extinguishers are the best type of extinguisher for welding. Water extinguishers are not a good idea in a welding shop since you are standing next to a machine which essentially transforms wall power into lightning.
Different Kinds of Welding
The main types of welding used in industry and by home engineers are commonly referred to as MIG welding, TIG welding, arc welding, gas welding. Hands down, MIG welding is the most common form of welding practiced, but there are other options for fusing metal together.
_________
GMAW or Gas Metal Arc Welding (more commonly called MIG welding) is the most widely used and perhaps the most easily mastered type of welding for industry and home use. The GMAW process is suitable for fusing mild steel, stainless steel as well as aluminum. A few years ago the full name – Metal Inert Gas (MIG) welding was changed to Gas Metal Arc Welding (GMAW) but if you call it that most people won’t know what the heck you’re talking about – the name MIG welding has certainly stuck.
MIG (Metal Inert Gas welding)is a semi-automatic arc welding process in which a consumable wire electrode and a shielding gas are fed through a welding gun, also known as the torch. The machine produces massive electrical current that travels through the consumable wire to your work pieces fusing and melting both the wire and the base metal together.

MIG welding was developed in the 1940’s as a way to speed up the way production welders fuse materials in factories during and after WW2. Seventy years later, the general principle is still very much the same but most MIG welding equipment has been modernized with better parts and some even have onboard computers.
MIG welding uses an arc of electricity to create a short circuit between a continuously fed positive anode (the wire-fed welding gun) and a negative cathode (the base metal being welded). If you want a greater understanding of the core principles of electricity check out the Electronics Class.
The heat produced by the short circuit, along with a non-reactive inert gas, melts the metals under the welding torch and allows them to mix together. Once the heat is removed, the metal begins to cool and solidify, forming a new piece of fused metal.
MIG welding is useful because you can use it to weld many different types of metals: carbon steel, stainless steel, aluminum, magnesium, copper, nickel, silicon bronze and other alloys. This class only goes over how to fuse mild steel, but your welder’s manual will have advanced instruction on how to weld other materials.

Oxy welding part of ammunition boxes, 1943 – from the Flickr Creative Commons Public Domain Image Library provided by the State Library of South Australia.
Oxy-Acetylene Torch Welding, more commonly Gas Welding and Cutting, are not used as widely for general welding of mild steel, but great for very delicate assembly of small ornate parts. This form of welding is one of the earliest industrial forms of welding. Gas welding consists of mixing oxygen and acetylene gas to create a flame capable of melting steels. The gas torch is commonly used for brazing softer metals such as copper and bronze, but can also be used for welding delicate aluminum parts such as refrigeration pipes.

Photo of TIG welding torch from ElektraSteel’s amazing TIG-Welded Steel Bowl Instructable.
GTAW (Gas Tungsten Arc Welding), or more commonly Tungsten Inert Gas (TIG) welding is comparable to oxyacetylene gas welding and needs quite a bit of hand/eye/foot coordination from the operator. TIG welds are best suited for out high-touch work, such as sculptures and architectural features. TIG welds provide a superior finish that needs minimal clean up by sanding or grinding.
TIG welding provides a very clean way to weld. In one hand you wield a torch electrode and connect ground to your base material. You activate the flow of current with a foot pedal and control the amount of current on the welder. Instead of a consumable wire feed being burned from the torch, the person welding gently feeds filler material from a rod into the welding pool. Since you control the feed of material, slag splatter is minimal. If you are interested in learning more about TIG welding, check out this Instructable.

Welder making boilers for a ship, Combustion Engineering Co., Chattanooga, Tenn. in June of 1942. Photograph by Alfred T. Palmer. From the Flickr Creative Commons – provided by the Library of Congress.
Arc Welding or Shielded Metal Arc Welding (SMAW) is more commonly referred to as stick or arc welding. Arc welding works by clamping a current producing electrode onto a coated consumable stick of material. An electrical arc travels from the tip of the consumable electrode to the base material underneath. The distance between the electrode tip and base material controls the amount of heat being generated by the super hot electrical arc. Arc welding is best suited for structural manufacturing, construction, and large-scale repairs. Arc welds get very very hot, and can burn out thin material easily, thinner materials are more suited to the MIG welding processes.
Pros and Cons of MIG Welding
Before going further in this class, please note that the lessons in this course only go over one of the kinds of welding listed above, MIG welding. MIG welding is the most common form of welding, albeit the price tag associated with a MIG welder can be high, it is the most accessible of welding skills to learn. More on that in our upcoming lessons.

Here are some advantages to MIG welding:
- The ability to join a wide range of metals and thicknesses
- All-position welding capability, meaning you can weld on vertical and overhanging surfaces with ease
- A good weld bead, with the right settings
- A minimal amount of weld splatter (compared to industrial stick welding)
- Easy to learn

Here are some disadvantages of MIG welding:
- MIG welding can only be used on thin to medium thick metals. Depending on the welder, I would say the thinnest would be 24GA steel, which is about .0239 inches, and medium thickness is about 1/4″ or 5/16″ – anything thicker than that, and it’s on to stick welding.
- The use of an inert gas makes this type of welding less portable than arc welding which requires no external source of shielding gas
- Produces a somewhat sloppier and less controlled weld as compared to TIG welding
Measuring, Marking, Squaring, and Clamping


Measuring Tools
Any good fabricator knows that improper measurement when working on any project is not advised and will lead to poorly crafted finished work. Be sure to invest in a number of reliable measuring and marking devices. The most common measuring tools you will need in your metalworking arsenal are tape measures, metal rulers, calipers, metal T-squares, and a marking tool of some kind. I often find myself doing a majority of my marking with a center punch or an extra-fine point permanent marker.

Welding Clamps & Magnets
Tight joints are key when welding pieces of metal together. Using welding clamps and grips will allow you to set your work piece up firmly while welding it together. Clamps and grips come in all shapes and sizes, so be sure to find the right kinds of clamps for your job, I swear there is a clamp out there for every kind of job.

If you are wanting to work quickly, or don’t need extensive jigging for holding your pieces together, consider using welding magnets. Welding magnets hold pieces at a variety of angles, but most commonly at 90, 45, 60, and 135.
Options for Cutting Metal

I had a shop teacher once tell me that with any tool you have three options: affordability, speed, and quality – but you only get to pick two. As we go over options in cutting metal, you will see what I mean. The cutting options presented below scale from least to most expensive.

For cutting thin rod and tube affordably, look no further than a hacksaw. Be sure to use the right blade for your material in your saw. Mild steel requires a blade with fewer teeth per inch (commonly referred to as TPI), like this 18 tooth per inch blade . Softer metals like aluminum or copper will need a blade with more teeth per inch . The cuts that you get with a hacksaw are slow, and often kind of chewed at the edges, making them not quite flush. You may want to use a miter box to try and get the squarest cuts possible.

Another option in cutting is using your trusty angle grinder with a cut-off wheel. The cut-off wheel will be rated for the kind of material you are cutting, as well as the thickness of the material you are cutting, so be sure to check the back of the wheel before you fit it to your grinder. Getting a square cut is a little tricky. You can achieve a square-ish cut in tube or rod by marking your material with a combination square, so you have a straight cutting guide, move your guard to the side of your grinder, then plunging the spinning wheel straight down into your material with the grinder perpendicular to your cutting plane. Cutting with an angle grinder goes fast, and leaves your material mostly smooth and very hot so allow it to cool.
If your studio has limited space, consider getting a grinder miter stand . These yield great results on a budget, are fairly portable, and can be stored easily.


Another affordable power tool you can use to cut metal is a sawzall . Sawzalls with the correct blade for your material cut through a metal tube like butter. I find that if I score my material with a straight line using a cut-off wheel, this creates a groove for the sawzall’s blade to follow. After scoring the grove, rotate the material 90 degrees and begin cutting with the blade following the grove. This yields a pretty quick, mostly square cut, that will require minimal deburring.


Lastly, let’s go over bandsaws. Above you see a vertical bandsaw(left) and a horizontal bandsaw(right). The vertical bandsaw is great for making small cuts in solid material, but not advised for larger jobs, or hollow tube. The horizontal bandsaw is, in my opinion, the best tool a welder could invest in for cutting metal.


This bandsaw gives the operator the most control and reliability in making cuts. You are able to set the speed of the blade, the angle of the cut, and the speed of which the blade descends into the material. You almost never have to deburr a cut made on the horizontal bandsaw, and if you do, its because your settings are too fast.


Often, if I have to make cuts of the same length over and over again, I will clamp a piece of material to the outfeed table at a set distance from the blade. This makes fast work for getting precise cuts over and over again. All I have to do is feed the material I am trying to cut until I hit the stop-block of the clamp, then I vice the metal and make the cut.


If you need to make accurate cuts on a jobsite, consider a porta band saw. They yield straight cuts that require minimal deburring, and often have variable speed control so you can set the blade speed for your material.
If you need to make custom shapes in sheet metal, check out this Instructable on plasma cutting. Plasma cutters are expensive tools, but lots of makerspaces are starting to purchase them for common use in their shop.
For a more in-depth tutorial and explanation on cutting metal, check out the Cutting lesson from the Metalworking class.
Sourcing Steel

Finding steel is easy! It’s pretty much everywhere around us. A keen eye can observe steel fixtures and welded parts in every part of our modern world. You are able to source steel from upcycled parts, or start with raw material from hardware stores and steel distributors. Big box hardware stores carry common lengths and thicknesses of steel sheet, bar, and pipe, and is usually found near lumber or fasteners.

If you are sourcing upcycled steel, pay extra attention to any possible coating that may be on your steel. Welding galvanized or powder coated parts can make you really sick, so be sure to grind off all finishes from parts before super-heating the base material with the welding torch, immolating whatever coating is on your steel to off gas toxic fumes.
When purchasing raw steel, you have to pay attention to whether or not the steel is hot rolled or cold rolled. Because steel is ductile, meaning that it is able to be stretched into shapes, raw iron is either shaped with heat or stretched over cold mechanical parts to be extruded into a shape. Let’s go over the difference.

Hot Rolled Steel
Hot rolled steel is formed at temperatures over 1,000 degrees Fahrenheit. This steel recrystallizes its form during the cooling process, giving the finished product looser tolerances than the original metal because the material has gone through so much shrinkage during cooling. This shrinkage causes the material to scale as it cools. The scale needs to be ground off with an angle grinder before we weld on to the material.
Hot rolled steel is often used for the manufacturing of structural components, such as I beams.

Cold Rolled Steel
Cold rolled steel undergoes a processing and shaping at room temperature. This increases the strength of the finished product through the use of strain hardening by as much as 20 percent. Cold rolled steel usually feels smoother to the touch and is a brighter shade of silvery gray.
Steel formed by the cold rolled steel process include bars, strips, rods, and sheets. These shapes are usually smaller than the same products available through hot rolled methods, but more suitable for the home and craft welder.
Cold roll steel has no scale that needs to be ground off. Because this kind of steel is stretched and shaped by machines, it is coated with a film of oil that allows it to roll with less friction during processing. We remove this film with acetone or denatured alcohol before welding.